There comes a time when every healthy indoor plant outgrows its home. You may notice roots pushing through the drainage holes, soil drying out too quickly, or your once-thriving plant suddenly slowing down. These are all signs that your plant is asking for a little more space.
For many beginners, repotting indoor plants can feel intimidating. It’s common to worry about damaging the roots, choosing the wrong pot, or accidentally killing a healthy plant.
The first time I repotted a plant, I was so sure I’d killed it. I pulled it out of its pot by the stem, shook the soil off like I was looking for gold, and shoved it into a new pot that was way too big. Two days later, the leaves started drooping so hard that I thought I’d need a funeral, not a care guide.
Spoiler: the plant survived. But it sulked for almost a month, and I learned the hard way that repotting isn’t just “move plant, add soil, done.”
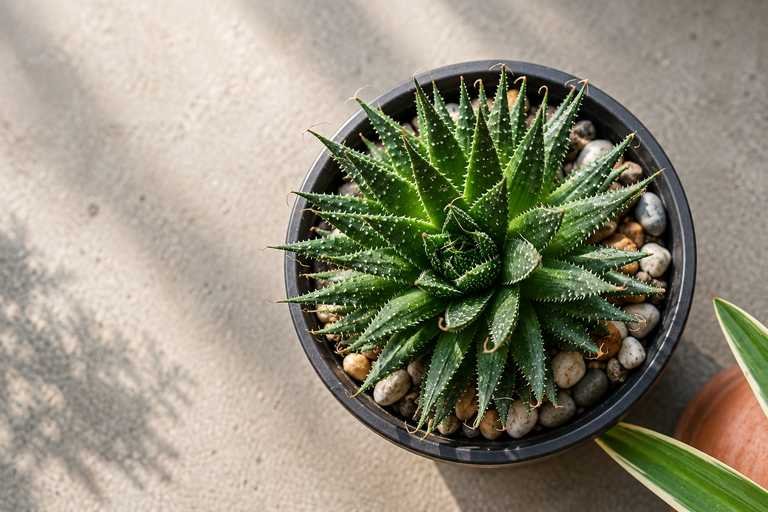
The good news is that repotting doesn’t have to be stressful, and there is a right way to do it that barely stresses your indoor plants. With the right timing, tools, and technique, it can actually help your plant grow stronger, healthier, and more vigorously.
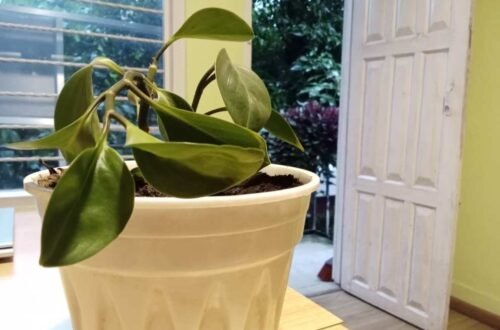
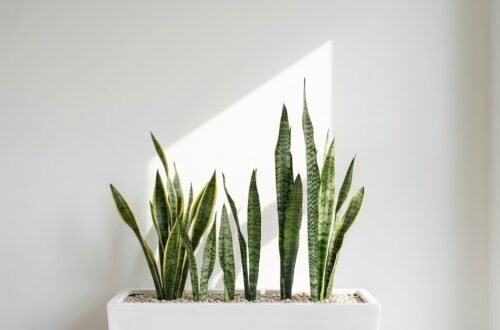
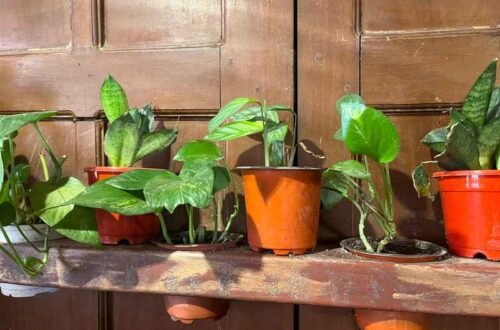
If you’ve got a root-bound Pothos, a Snake Plant, Peace Lily, Monstera, or a Heartleaf Philodendron that’s drying out two days after watering, or a plant that just looks like it is going to give up on its life.
If so, this guide will help you understand how to repot indoor plants exactly, step by step, without the drama I put my first plant through. Repotting indoor plants correctly is an essential skill for every plant parent.
Table of Contents
Why Is Repotting Indoor Plants Important?
Many people assume repotting is simply about moving a plant into a bigger pot. While giving roots more room is one benefit, repotting also improves the overall health of your plant.
Over time, potting soil breaks down and loses its ability to hold nutrients, oxygen, and moisture effectively. Roots continue to grow until they become crowded, eventually circling the inside of the pot. This condition, known as being root-bound, restricts water and nutrient absorption and slows the plant’s growth.
Repotting helps by:
- Giving roots more room to grow
- Refreshing old, compacted soil that would choke indoor plants.
- Improving drainage and aeration that provides fresh oxygen to the root zone of the indoor plants.
- Encouraging healthier root development.
- Reducing the risk of root rot that destroys your plants from the bottom by absorbing water and nutrients.
- Supporting stronger foliage and faster growth that improves the indoor plants’ overall system dramatically.
Think of repotting as giving your indoor plant a fresh start.
How do you know it’s time to repot indoor plants? 7 signs to look out for!
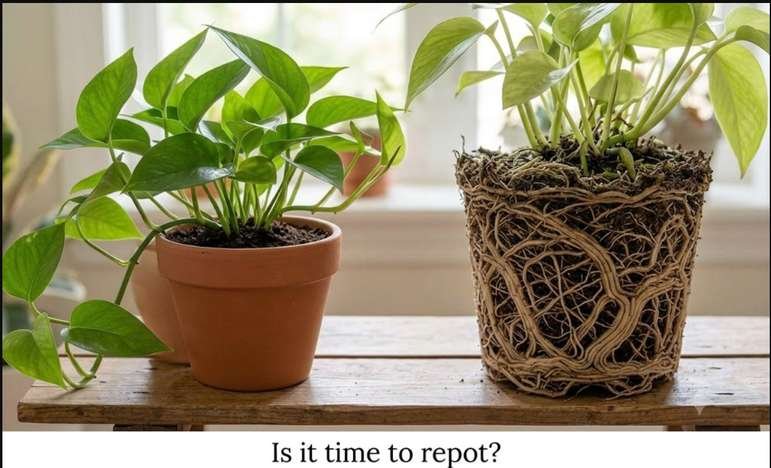
Many beginners repot either too early or too late. So, before you grab a trowel, check for these signs in your indoor plants:
- Roots poking out of the drainage holes, which means the roots are growing and they don’t have enough space around.
- Water drains through the pot quickly without the soil absorbing it. It could be because the grown roots have replaced the soil inside the pot.
- Growth has stalled, even in the growing season. If there is stunted growth in the spring and summer seasons, then it is time to repot your indoor plants.
- The soil dries out very quickly and needs watering every other day. This might be due to the root-bounding of your indoor plants.
- The circled roots around the soil might be another reason to repot indoor plants. After removing the plant from its pot, you notice roots tightly wrapped around the root ball.
- The plant looks too big for its pot, top-heavy, or tipping over. Large foliage paired with a small container makes the plant unstable.
- You haven’t repotted in 1–2 years (most indoor plants need it eventually). As the soil starts looking old and compact, the potting mix naturally breaks down, which reduces drainage and airflow.
If none of these apply, leave it alone. Don’t even think about repotting your indoor plants. Overpotting, moving a plant into a pot that’s too big, causes more problems than underpotting ever will.
Best Time to Repot Indoor Plants
Timing can make a big difference in repotting indoor plants.
The best season to repot your indoor plants is Spring because most indoor plants enter their active growing phase. The shock repair is also instant, along with faster stabilization of your indoor plants. The ideal environmental conditions and efficient moisture and nutrient use makes the spring best for repotting your indoor plants.
Early summer is also a good time, as plants recover more quickly and the warm soil temperatures make root expansion faster in the new pot. Maximum daylight provides enough energy needed for the indoor plants, so repotted plants heal faster and grow out better.
Late Summer / Autumn are also fair seasons, but the growth slows down significantly. Repotting leaves the plant vulnerable as it enters the darker months.
Avoid repotting during winter unless:
- the plant has severe root rot,
- the pot is broken,
- or the plant is extremely root-bound and cannot wait until spring.
Repotting during dormancy often slows recovery down because plants aren’t actively producing new roots. During dormancy, there is no healing energy, and the indoor conditions are also less favorable for repotting indoor plants.
Tools That You Will Need
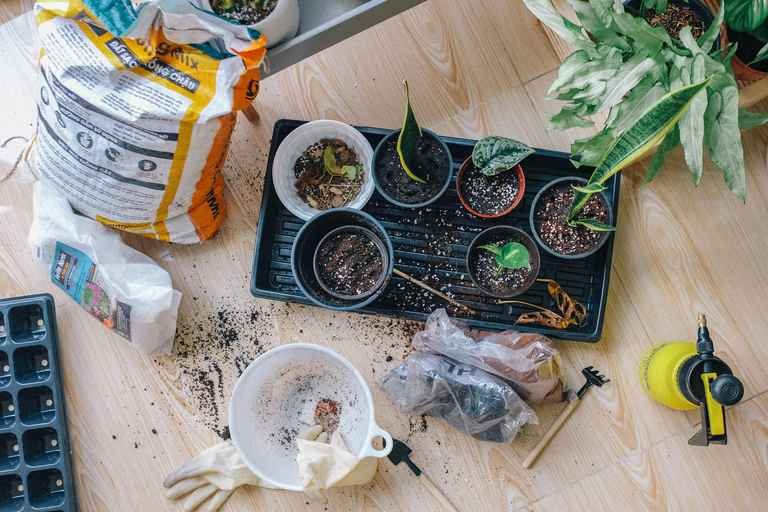
Before you repot indoor plants, gather everything you need at one place.
| Tools | Why you need it? |
| A new pot, 1–2 inches larger in diameter than the current one with proper drainage holes. | To prevent Waterlogging. |
| Fresh, well-draining potting mix that suits your plant type | To provide nutrients and better drainage. |
| A trowel or old spoon | To fill the pots easily. |
| Scissors or pruning shears (Clean and Sharp) | To remove dead and damaged roots. |
| A watering can | To settle the soil after repotting. |
| Newspaper, tray or a towel | To catch the mess and keep your place tidy. |
| Gardening gloves | To keep your hands clean and prevent the soil from getting inside your nails. |
Pro Tip: Do not choose a pot that’s too large; big pots hold excess moisture, increasing the risk of root rot.
The 10 Easy Steps To Repot Indoor Plants
Repotting an indoor plant is not just about moving it into a larger container. It is an opportunity to inspect its roots, refresh the soil, and create the ideal conditions for healthy growth.
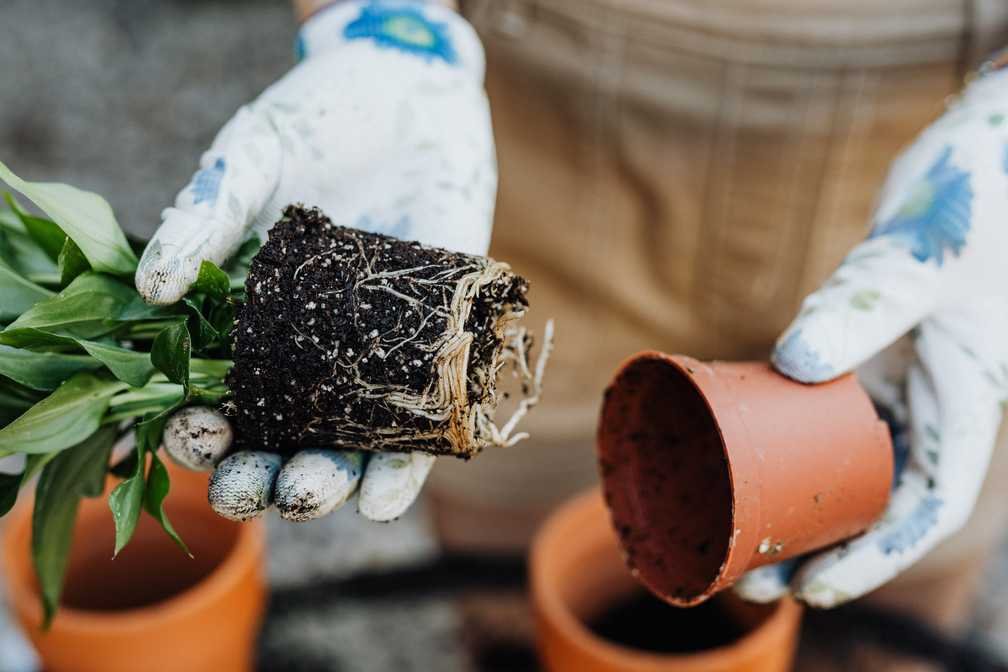
Follow these 10 simple steps to repot your indoor plants with confidence.
Step 1: Choose the Right Time to Repot
Timing is one of the most overlooked aspects of successful repotting. As mentioned above, repot during your indoor plant’s active growing season: spring or early summer for most indoor plants. This is when roots recover fastest, and the new roots grow with the quick plant recovery.
Avoid repotting right after buying a plant, during winter dormancy, or when it’s already flowering or stressed.
Repot immediately only if:
- The plant is severely root-bound.
- The pot is cracked or broken.
- Root rot is spreading.
- The soil has become compacted or waterlogged.
Pro Tip: Repot in the morning or on a cool, cloudy day to reduce stress from heat and direct sunlight.
Step 2: Choose a Pot Just One Size Up
Selecting a container that is vastly larger than your current one is a classic beginner pitfall. While it may feel like you are providing more breathing room, oversized pots retain excess moisture that roots simply cannot process, which is the fastest way to invite root rot into your plant’s home.
Instead, look for a diameter that is only 1–2 inches wider. Your new pot must have drainage holes, no exceptions, regardless of how “cute” the ceramic might look on your shelf.
Ensure your selection:
- Has at least one drainage hole.
- Is made of a breathable material, like terracotta, if you tend to overwater.
- Is stable enough to support the plant’s size.
Pro Tip: Decorative cachepots are lovely for styling, but for health, your plant should always live in a nursery pot with drainage tucked inside them.
Step 3: Prepare Fresh Potting Mix
Potting soil eventually breaks down, losing its nutrients and becoming a compacted mess that chokes off oxygen. This is why just moving a plant without refreshing the medium isn’t enough for a true fresh start.
Invest in a high-quality mix tailored to your specific plant. Tropical favorites like Pothos, Monsteras, and Heartleaf Philodendrons love a loose, well-draining environment.
For a great DIY blend, try:
- 2 parts standard indoor potting soil
- 1 part perlite for aeration. You can use crushed eggshells, nut shells, or charcoal pieces instead.
- 1 part orchid bark or coco chips for texture. You can also use shredded fall leaves or torn cardboard.
Never use garden soil for your indoor plants; it packs down too tightly, drains poorly, and can bring unwanted pests into your home.
Pro Tip: Pre-moisten your new mix until it is slightly damp. It will be much easier to work with and helps the soil settle around the roots more evenly.
Step 4: Water the Plant a Day Before and Prepare Your Workspace
Repotting a completely dry plant can cause unnecessary stress. Dry roots are brittle and more likely to snap when removed from the pot.
Give your plant a good soak roughly 24 hours before you begin. Damp soil clings together better and glides out of the container with ease, making the transition much gentler on the root system than wrestling with a dry, dusty root ball.
Don’t soak the plant immediately before repotting, though. Soggy soil can become messy and make it harder to inspect the roots.
Pro Tip: Gently pressing the sides of a plastic nursery pot can make it much easier to slide out a root-bound plant.
Now you need to prepare your workspace. Lay down newspaper or an old towel because this gets messy no matter how careful you are. Have your new pot, soil, and tools within reach before you start, so the roots aren’t exposed to air any longer than necessary.
Step 5: Loosen and Remove the Plant Carefully
Tip the pot sideways and gently squeeze the sides to loosen the root ball. Gently slide the plant out by supporting the base of the stem. Never pull it out by tugging on the leaves or stem itself, as it can cause serious damage.
Lay the pot on its side, hold the base of the plant near the soil line, and gently slide it out. Never pull the plant by its stems or leaves, as this can cause serious damage.
If the plant is stuck:
- Tap the sides of the pot.
- Loosen the edges with a trowel or butter knife (avoid damaging roots).
- Squeeze plastic pots gently to free the root ball.
Once removed, inspect the roots carefully.
Healthy roots are:
- White or cream-colored
- Firm to the touch
- Evenly spread
Unhealthy roots are:
- Brown or black
- Mushy
- Foul-smelling
Trim dead or rotten roots with sterilized pruning shears.
Pro Tip: Always disinfect your tools before pruning roots to reduce the risk of disease.
Step 6: Inspect and Gently Loosen the Roots
Look at the root ball. If roots are tightly circling the pot, they are root-bound. So, gently tease them apart with your fingers. This encourages them to grow outward into the fresh soil instead of continuing to circle.
For severely root-bound plants, you can make a few shallow vertical cuts around the root ball with a clean knife. This stimulates new root growth, but only if necessary.
Trim any roots that are mushy, black, or clearly dead. But do not remove too many roots. Healthy roots that are firm and usually white or light tan are essential for water and nutrient uptake.
Pro Tip: Be gentle. The goal is to encourage new growth, not strip the plant of its root system.
Step 7: Add a Base Layer of Fresh Soil
Add a couple of inches (about 2-3) of fresh potting mix to the bottom of the new pot before placing the plants inside. This gives the roots something new to grow into right away and sets the right planting depth. It prevents the plant from sitting too low in the pot.
To prevent the stem or crown from being buried and risking root or stem rot, ensure the plant is not placed too deep. Conversely, if it is positioned too high, watering may leave the roots exposed.
Carefully modify the layer of soil underneath the root ball so the plant remains at roughly the same depth as its original pot.
When you have achieved the ideal positioning, begin adding your new medium into the gaps surrounding the roots.
Avoid firming the soil too aggressively, because dense, packed earth can stifle oxygen flow and lead to poor drainage. Gently settle the mix, so it remains light and fluffy, giving those roots the breathing room they need to thrive.
Pro Tip: Lightly moisten the fresh potting mix before using it to help it settle evenly around the roots and prevent dry pockets.
Step 8: Position the Plant
Position the plant so the top of the root ball sits about 1 inch (2.5 cm) below the rim. This creates enough space for watering without allowing soil or water to spill over the edge.
Before adding the fresh soil, make sure the plant is upright and centered in the pot.
Fill the space around the root ball gradually, and avoid burying the stem or crown deeper than it was in the previous pot, as this can increase the risk of stem rot.
Pro Tip: Rotate the pot as you add soil to ensure it spreads evenly around the root ball and supports the plant from all sides.
Step 9: Fill In Around the Roots
Gradually add potting mix around the sides of the root ball.
Lightly press the soil with your fingers to remove large air pockets, but don’t pack it tightly. Roots need oxygen as much as they need water.
Leave a small gap between the soil surface and the rim of the pot, about half an inch to make watering easier. This will prevent the overflow while watering your indoor plants.
Pro Tip: Give the pot a gentle tap on the table to help the soil settle naturally.
Step 10: Water Thoroughly and Skip the Fertilizer
Once the plant is in its new pot, water the plant well and slowly until it drains from the bottom, which helps settle the soil around the roots.
This first watering helps:
- Settle the soil around the roots.
- Eliminate remaining air pockets.
- Begin the plant’s recovery process.
Allow excess water to drain completely. Never let the pot sit in standing water.
Pro Tip: If the soil settles significantly after watering, add a little more potting mix to maintain the proper level.
Then hold off on fertilizing for about 4–6 weeks. The fresh potting mix already has nutrients, and stressed roots don’t need the extra push.
Aftercare: The First Two Weeks
Your plant may look a little sad for a few days. Some drooping or minor leaf drop is normal and doesn’t mean you did something wrong.
The first two weeks after repotting are all about recovery.
Place the plant in bright, indirect light rather than direct sunlight and resist the urge to move it around or repot it again. Let the roots settle in peace.
Avoid fertilizing for about four weeks, as mentioned above.
Keep the soil slightly moist, but don’t overwater. A little transplant shock is normal. Some plants may droop slightly before they bounce back.
Give your plant some time to adjust and watch for signs of recovery.
Signs your plant is recovering:
- New leaves appear.
- Growth resumes.
- Leaves become firm again.
- Roots begin establishing themselves in the new soil.
Pro Tip: Keep the plant away from drafts, heaters, and air conditioners during recovery, as sudden temperature changes can add extra stress while the roots are settling in.
10 Common Repotting Mistakes and How to Avoid Them
Knowing how to repot indoor plants is only half the process. Avoiding common mistakes is just as important for helping your plants adjust, develop healthy roots, and continue growing after repotting.
Here are 10 mistakes to avoid when repotting indoor plants:
1. Choosing a Pot That Is Too Large
A bigger pot isn’t always better. Excess soil can hold too much moisture around the roots, increasing the risk of root rot.
How to avoid it: Choose a pot about 1–2 inches (2.5–5 cm) wider than the current container.
2. Repotting at the Wrong Time
Repotting while many indoor plants are dormant can make recovery slower and increase stress.
How to avoid it: Whenever possible, repot during spring or early summer, when plants are actively growing.
3. Using Garden Soil
Garden soil can become dense in containers, reducing drainage and airflow. It may also introduce pests or diseases.
How to avoid it: Use a quality indoor potting mix suited to your plant.
4. Damaging the Roots
Roughly pulling the plant out or removing healthy roots can slow its recovery.
How to avoid it: Handle the root ball gently and remove the roots that are dead, mushy, or damaged.
5. Overwatering After Repotting
Newly repotted plants don’t need constant watering. Waterlogged soil can reduce oxygen around the roots and encourage root rot.
How to avoid it: Water thoroughly after repotting, then allow the soil to dry slightly before watering again.
6. Fertilizing Too Soon
Fresh potting mix often contains nutrients, so adding fertilizer immediately can place unnecessary stress on recovering roots.
How to avoid it: Wait around 3-4 or 4-6 weeks before fertilizing unless your potting mix specifically recommends otherwise.
7. Packing the Soil Too Tightly
Firmly compressing the potting mix can reduce air circulation and make it harder for water to drain properly.
How to avoid it: Add the soil gradually, and gently press it into place without compacting it.
8. Ignoring Drainage
A pot without drainage holes can trap excess water and create conditions that lead to root problems.
How to avoid it: Choose a pot with drainage holes, or keep your plant in a nursery pot inside a decorative planter.
9. Exposing the Plant to Harsh Sunlight
Repotting can temporarily stress indoor plants, and intense direct sunlight may make recovery more difficult.
How to avoid it: Place the plant in bright, indirect light while it adjusts to its new container.
10. Repotting Too Often
Repotting too frequently can disturb the roots unnecessarily and create additional stress.
How to avoid it: Repot when your plant shows signs of overgrowing its container or when the potting mix has significantly deteriorated.
Frequently Asked Questions (FAQs)
Should I remove all the old soil when repotting an indoor plant?
No. You generally don’t need to remove all the old soil from the root ball. Gently loosen some of the soil around the roots and remove only soil that is compacted, depleted, or associated with unhealthy roots. Keeping some of the original soil can make the transition less stressful for your indoor plant.
Can I repot an indoor plant without changing the pot?
Yes. Repotting indoor plants doesn’t always mean moving them into a larger container. If the current pot is still an appropriate size, you can refresh the old potting mix, inspect the roots, and return the plant to the same container. This is especially useful when the soil has broken down but the plant hasn’t outgrown its pot.
Should I loosen the root ball when repotting?
If the roots are tightly circling the root ball, gently loosening them can encourage outward growth into the fresh potting mix. However, avoid aggressively pulling apart healthy roots, as unnecessary root damage can slow recovery.
Can I repot an indoor plant while it is flowering?
It’s usually better to wait until flowering has finished if the plant is otherwise healthy. Repotting while flowering can add unnecessary stress and may cause the plant to drop flowers or redirect energy toward root recovery. Repot immediately only when there is a serious problem, such as root rot or a damaged container.
How long does it take for an indoor plant to adjust after repotting?
Most healthy indoor plants need anywhere from a few days to several weeks to adjust to a new pot. Temporary drooping, slower growth, or minor leaf loss can occur during this period. Stable light, appropriate watering, and avoiding unnecessary disturbance can help the plant recover.
Can I reuse old potting soil when repotting indoor plants?
It is generally better to use fresh potting mix when repotting, particularly if the old soil is compacted, depleted, contaminated with pests, or has poor drainage. Fresh mix provides a better growing environment and helps restore proper aeration and moisture balance around the roots.
Why is my indoor plant drooping after repotting?
Drooping after repotting indoor plants is often a sign of temporary transplant stress. The roots may need time to adjust after being disturbed. Keep the plant in a stable environment with appropriate light and avoid overwatering while it recovers. If the drooping continues or worsens, check the roots and soil for signs of root damage or excessive moisture.
What’s the best soil for repotting houseplants?
Use a well-draining mix suited to the specific plant: general indoor plant mix for most, a chunkier aroid mix for plants like philodendrons and monsteras, and a cactus/succulent mix for succulents.


pvtqirnjkyqvflelpghtrqqruzjftj
mzspekinwzkltvrrjwtrjvqluftvft