Few things are more frustrating for an indoor plant lover than discovering that a plant that looked perfectly healthy a few days ago is suddenly covered in tiny pale spots, yellowing leaves, or delicate webbing.
The first thought is often, “Is my plant dying?”
Sometimes the real problem is much smaller.
I once spent two weeks diligently wiping “dust” off my philodendron’s leaves, feeling very proud of my plant-parent diligence until I noticed the fine webbing between the stems and realized the “dust” had legs. I hadn’t been cleaning my plant. I’d been giving spider mites a fresh leaf to restart on, over and over
That’s the thing about spider mites: by the time you notice them, they have already had a head start. The good news is, once you know what you’re actually looking at, it’s an easy fix.
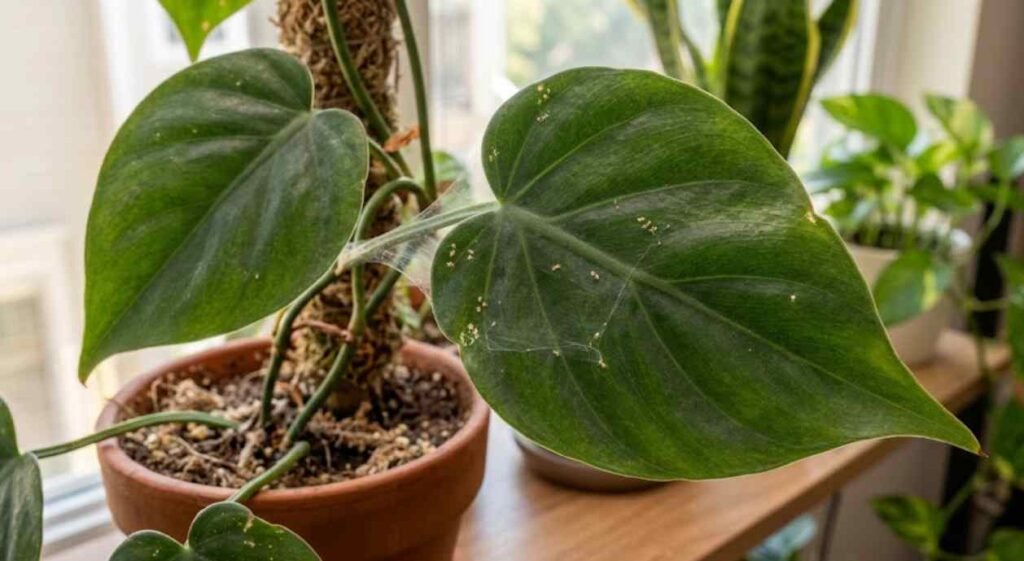
Spider mites are among the most common pests that can attack indoor plants. They are extremely tiny and can be difficult to see without close inspection, but their feeding damage can become obvious surprisingly quickly. A serious infestation can weaken a plant, cause leaf drop, stunt growth, and, in severe cases, contribute to plant death.
The good news is that finding spider mites does not automatically mean you need to throw your plant away.
With early detection, physical cleaning, isolation, appropriate treatment, and consistent follow-up, many infestations can be brought under control.
In this guide, we’ll look at what spider mites are, how to identify them, what actually works, which popular remedies are questionable, and how to prevent them from coming back.
Table of Contents
What Are Spider Mites, Exactly?
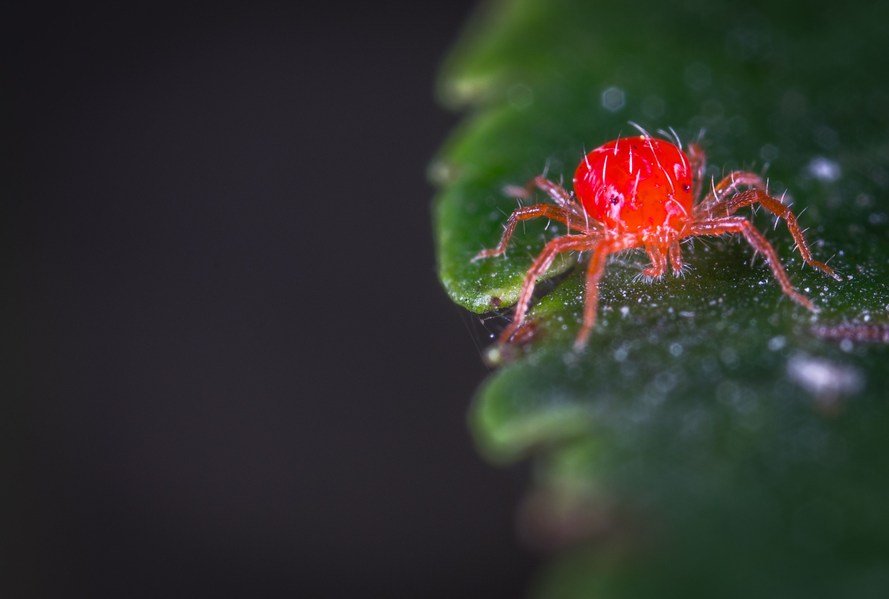
Despite their name, spider mites are not insects.
They belong to the arachnid group, along with spiders and ticks. One of the most common species affecting plants is the two-spotted spider mite (Tetranychus urticae).
These mites are extremely small, around 1/50 of an inch long, according to the University of Minnesota Extension, so you may notice the damage before you ever notice the mites themselves.
Spider mites feed by piercing plant cells and sucking out their contents. This creates tiny damaged areas on the leaves that can appear as pale speckles or stippling.
As the infestation becomes more severe, leaves may develop a dull, grayish, bronze, or yellow appearance. Fine webbing may eventually become visible, particularly around leaves and stems.
Are spider mites actually spiders?
Not exactly. They are related to spiders because both belong to the arachnid group, but spider mites are tiny plant-feeding pests rather than spiders.
And unlike the occasional harmless spider you may find around your home, spider mites can seriously damage plants when their populations become large.
Spider mites can seem to appear out of nowhere, but they usually get onto houseplants through a few identifiable routes.
Where do spider mites come from?
1. New plants, the most important route to watch
A plant can look completely healthy at the garden center or nursery while carrying a small spider-mite population. Eggs and mites can be difficult to spot because they’re so tiny. This is why inspecting and quarantining new plants is recommended before placing them with your existing collection.
2. Outdoor plants coming indoors
If you move a houseplant outside for summer and later bring it indoors, it can bring pests back with it. Spider mites are common plant pests outdoors, so inspect the foliage carefully before bringing plants back inside.
3. Nearby infested plants
Spider mites can move from one plant to another, particularly when plants are kept close together. If one plant has an infestation, check the plants immediately around it rather than treating only the visibly affected plant.
4. People, clothing, tools, and plant handling
Spider mites can sometimes be transported mechanically when people handle infested plants or move leaves and plant material around. This is another reason to avoid moving an infested plant around your collection unnecessarily.
5. Outdoor exposure through open windows
This can happen, although I’d be careful about presenting it as the main cause. Outdoor mites and other pests can potentially reach indoor plants, particularly when plants are near open windows or balconies. However, an infested plant is generally a more useful explanation to investigate first.
Does Dry Air cause Spider Mites?
You’ll often see: “Spider mites come from dry air.” That’s an oversimplification.
Dry, hot conditions can favor spider-mite population growth and make infestations more severe, but dry air doesn’t spontaneously create spider mites. The mites still have to get onto the plant somehow.
9 Signs to Look for Spider Mites on Indoor Plants
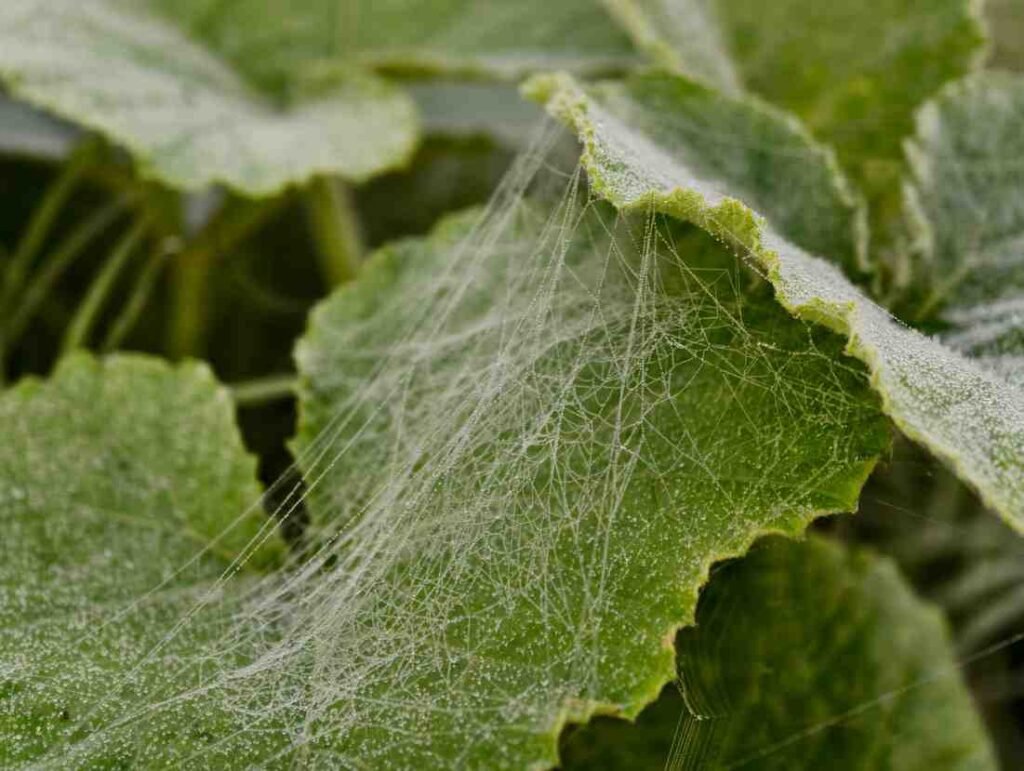
Spider mites are easy to miss in the early stages, so learning the warning signs is important.
1. Tiny pale spots on the leaves
One of the earliest signs is stippling. Many tiny pale dots or speckles appear across the leaf surface. This happens because spider mites damage individual plant cells as they feed. The damage can initially look like dust, faded color, or a slightly unhealthy leaf.
2. Leaves start looking dull or washed out
As feeding continues, the tiny spots can become more widespread. Instead of looking deep green and healthy, the leaves may develop a dull, grayish, yellow, or bronze appearance.
Colorado State University Extension identifies flecking, discoloration, bronzing, and scorching as characteristic symptoms of spider-mite feeding.
3. Yellowing leaves
Yellow leaves can have many causes, including overwatering, underwatering, nutrient problems, insufficient light, and natural aging.
That is why yellow leaves alone are not proof of spider mites.
However, if yellowing appears together with stippling, fine webbing, or mites on the underside of leaves, spider mites become much more likely.
4. Fine webbing appears
This is one of the signs people commonly associate with spider mites. But there is an important distinction: Not every spider web on a plant means spider mites.
Spider mites can produce fine webbing, especially as their population grows. Heavy infestations can create noticeable webbing around leaves and stems.
So don’t panic when you see a single ordinary spider web. Look for the webbing together with leaf damage and tiny mites.
5. Leaves begin dropping
A heavily infested plant may eventually lose leaves. This happens because continued feeding damages the plant’s photosynthetic tissue and can place considerable stress on the plant.
Premature leaf drop is documented as a symptom of severe spider-mite infestations.
6. The underside of leaves looks suspicious
Spider mites commonly feed on the undersides of leaves. That means looking only at the upper surface isn’t enough. Turn leaves over and inspect them carefully, particularly if you notice unusual speckling on top.
A small hand lens can make the inspection much easier. University of Minnesota Extension also recommends examining the underside of discolored leaves with a hand lens.
7. You notice tiny moving dots
Adult two-spotted spider mites are extremely small, but close inspection may reveal tiny moving organisms.
If you’re unsure whether you’re actually seeing mites, try the simple white-paper test.
The white-paper test
- Hold a white piece of paper beneath a suspicious leaf.
- Gently shake or tap the leaf.
- Look closely at the paper.
- Watch for tiny moving specks.
A hand lens can help you examine anything you find. This method is recommended by University of Minnesota Extension as one way to detect spider mites.
8. New growth looks weaker
A serious infestation can interfere with healthy plant growth. You may notice that new leaves are smaller, less vigorous, or developing poorly.
This is particularly concerning when the plant is showing several other spider-mite symptoms at the same time.
9. The problem keeps returning after cleaning
If you wipe the leaves once and the problem seems to disappear, only to return a few days later. You may be dealing with an established infestation.
Spider mites have a relatively short life cycle under favorable conditions. Colorado State University Extension notes that the two-spotted spider mite can complete its life cycle in approximately one to two weeks under favorable conditions.
This is one reason one treatment is often not enough.
Why are Spider Mites on indoor plants so common?
Spider mites tend to become more problematic when plants experience hot, dry, stressful conditions.
Indoor plants can encounter these conditions near:
- sunny windows
- heaters
- heating vents
- air-conditioning systems
- very dry rooms
- hot outdoor conditions when plants are moved outside
University extension sources specifically identify hot, dry conditions and plant stress as factors associated with spider-mite problems.
This is particularly relevant during periods of summer heat. But there is an important myth to clear up:
Myth: “Spider mites only attack dry plants.”
Not necessarily. Dry conditions can favor spider mite outbreaks, but a well-watered plant does not make it immune.
Spider mites can infest many types of plants, and some infestations begin when an already-infested plant is brought into the home.
Colorado State University Extension recommends checking new plants carefully and quarantining them separately for a few weeks to reduce the chance of introducing pests.
How to Get Rid of Spider Mites on Indoor Plants?
The most effective approach isn’t usually one magical home remedy. Think of spider-mite control as a process. The goal is to reduce the population, physically remove mites, treat remaining pests, and prevent the infestation from spreading.
Step 1: Isolate the affected plant
Move the affected plant away from your other indoor plants. This is one of the simplest and most useful first steps. Spider mites can move between nearby plants. They can also be transported by people, tools, or plant movement.
Keeping an infested plant separate makes the rest of your collection easier to monitor.
Step 2: Inspect your other plants
Don’t stop at the plant where you found the first signs.
Check nearby plants, especially:
- the undersides of leaves
- leaf joints
- stems
- new growth
- plants sitting close together
You may discover that more than one plant has already been affected.
Step 3: Give the plant a thorough rinse
One of the most useful nonchemical treatments is surprisingly simple: Water.
For plants that can safely tolerate it, rinse the foliage thoroughly, paying particular attention to the undersides of the leaves. A gentle but reasonably forceful spray can physically dislodge mites and webbing.
University of Minnesota and Colorado State University Extension both recommend washing or spraying plants as part of spider-mite management.
For small plants, a sink or shower can work well.
For larger plants, wipe the leaves carefully with a soft, damp cloth if a shower isn’t practical.
Important: Don’t blast delicate leaves with enough force to damage them. The goal is to remove pests, not replace a pest problem with broken foliage.
Step 4: Remove badly damaged leaves
If individual leaves are heavily damaged, yellowing, or covered with extensive webbing, pruning them may help reduce the infestation.
Place removed material directly into a bag and dispose of it rather than leaving it beside your other plants.
Colorado State University Extension recommends trimming and removing heavily infested leaves and disposing of severely infested plants when necessary.
Step 5: Consider insecticidal soap
If washing isn’t enough, a properly labeled insecticidal soap can be useful.
Insecticidal soaps are generally made from potassium salts of fatty acids and work primarily through direct contact with pests. That means coverage matters.
You need to reach the places where the mites are actually present, including the undersides of leaves. University of Minnesota Extension notes that insecticidal soaps have little residual activity and generally need to contact the mites directly.
Very important: Do not assume ordinary dish soap is the same as insecticidal soap.
Homemade soap mixtures can damage plant tissue. University of Minnesota Extension specifically warns against homemade soap solutions because they can burn plants. Always follow the product label.
Step 6: Consider horticultural oil
Horticultural oils are another commonly recommended option for spider-mite management. These highly refined oils can work by physically affecting the pests when they come into contact with them.
Colorado State University Extension identifies horticultural oils as among the more useful treatments for spider mites on indoor plants.
Again, coverage is essential. Read the label carefully and follow its directions for dilution, application, and plant safety.
Step 7: Repeat the treatment
This is where many people give up too early.
You treat the plant, see fewer mites, and assume the problem is solved. Then a week later, they’re back.
The reason is simple: spider mites have multiple life stages, and a single treatment may not eliminate every individual or egg.
Extension guidance recommends repeated treatments while populations persist. Colorado State University Extension, for example, recommends repeating washing and related treatments at one- to two-week intervals while the infestation continues.
Follow the specific label instructions for any pesticide or miticide you use rather than creating your own schedule.
Step 8: Keep monitoring
After treatment, inspect the plant regularly.
Look for:
- new stippling
- fresh webbing
- yellowing
- moving mites
- damaged new growth
Don’t just inspect the leaves once. Spider-mite management works much better when you catch a returning population early.
Step 9: Don’t forget neighboring plants
If one plant has spider mites, keep checking the plants around it. A treatment program can fail if an untreated neighboring plant continues to act as a source of mites.
For significant infestations, Colorado State University Extension recommends treating susceptible indoor plants at the same time.
What About Neem Oil?
Neem oil is one of the most frequently recommended “natural” remedies for indoor plants online. But this is where it’s important to separate natural from automatically effective.
Neem-derived products can have pest-control properties, but they are not a magical cure for every spider-mite infestation.
University of Minnesota Extension distinguishes neem products from horticultural oils and notes that neem-based products can have different modes of action and uses depending on their formulation.
If you choose to use a neem product, use a product that is properly labeled for the intended use, and follow its instructions.
Also remember that natural products can still injure plants if used incorrectly.
What About Misting?
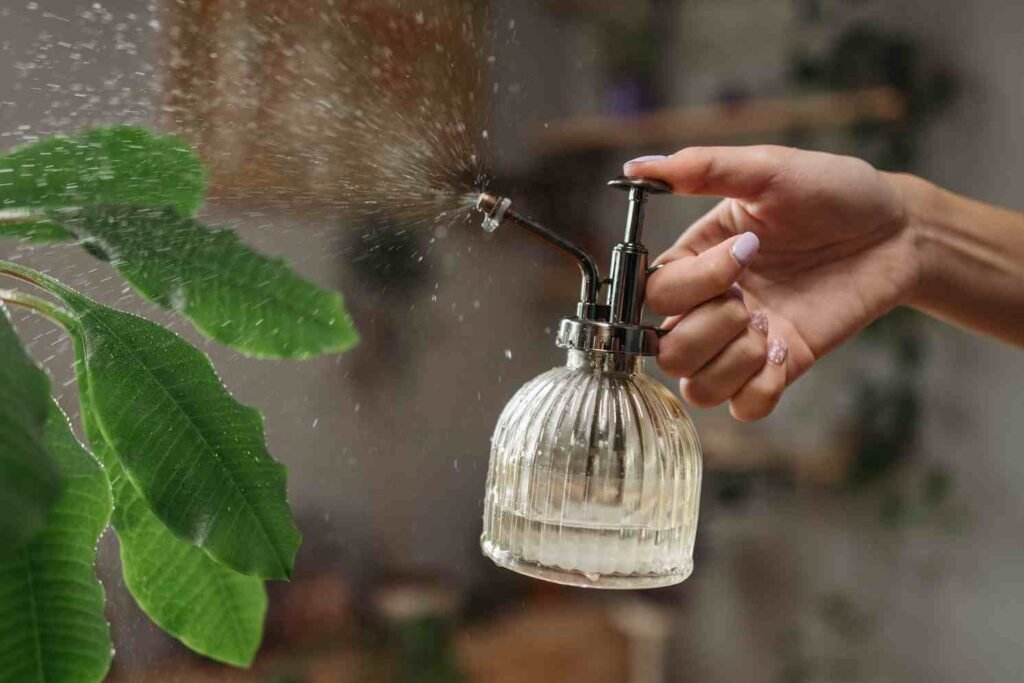
This is another popular indoor plant tip. You may have heard: “Just mist your plant every day, and spider mites will disappear.”
That’s an oversimplification.
Spider mites can thrive under hot and dry conditions, and improving the plant’s growing environment can help reduce stress. However, misting alone should not be considered a reliable spider-mite treatment.
Physical washing, monitoring, isolation, and appropriate pest-control products are much more important parts of an actual management strategy.
What About Cinnamon, Vinegar, or Dish Soap?
You will find plenty of DIY spider-mite recipes online. But more natural does not automatically mean safer or better.
Vinegar
Vinegar is acidic and can damage plant tissue. It should not be treated as a universal spider-mite cure.
Dish soap
Ordinary dishwashing detergents are not the same as commercial insecticidal soaps. Some household detergents can injure leaves. University extension guidance specifically warns about the potential for plant injury from homemade soap treatments.
Cinnamon
Cinnamon has become popular in online plant-care communities, but it should not be presented as a scientifically established treatment for an active spider-mite infestation.
If you want to control spider mites, start with methods supported by horticultural extension guidance rather than viral kitchen remedies.
How to Prevent Future Outbreaks of Spider Mites on Indoor Plants?
You can’t guarantee that your plants will never develop spider mites. But you can make infestations easier to catch and reduce some of the conditions that favor serious outbreaks.
1. Inspect new plants before bringing them home
A beautiful new plant can unfortunately come with unwanted guests. Check leaves carefully before adding it to your collection.
For extra protection, keep new plants separate from your existing collection for a few weeks and monitor them.
Colorado State University Extension specifically recommends checking plants before purchase and quarantining new plants to reduce the introduction of pests.
2. Clean dusty leaves
Dust doesn’t magically create spider mites, but clean foliage makes it easier to inspect plants and can help maintain healthy leaves.
Wipe broad leaves gently with a damp cloth when appropriate for the plant.
3. Avoid unnecessary plant stress
Give your plants the conditions they actually need:
- Appropriate light
- Appropriate watering
- Suitable temperature
- Adequate airflow
- Reasonable humidity for the species
Avoid swinging between severe drought and excessive watering. Remember that “more water” is not the answer to spider mites.
Overwatering can cause a range of problems, including root damage.
4. Check the undersides of leaves
This is one of the easiest habits you can develop. Once a week, take a few minutes to inspect your plants.
Look underneath the leaves rather than simply admiring the plant from above.
5. Keep susceptible plants under observation
Some indoor plants are more frequently associated with spider-mite problems than others.
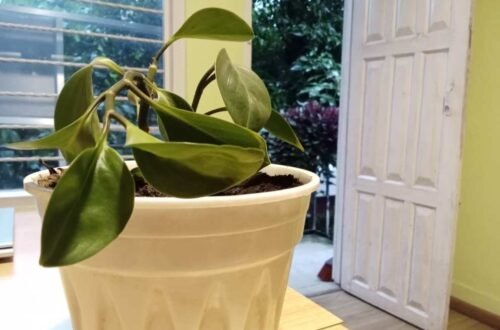
University of Minnesota Extension notes that palms, philodendrons, and figs can experience more spider-mite outbreaks, although any plant can potentially become infested.
This doesn’t mean you should avoid these plants. It simply means they deserve regular inspection.
When Should You Throw Away a Spider-Mite Infested Plant?
This is probably one of the hardest decisions for plant lovers. If the infestation is small and the plant is valuable or otherwise healthy, treatment is often worth attempting.
But a severely damaged plant can become a continuing source of pests for the rest of your collection.
Colorado State University Extension notes that heavily infested plants may sometimes be best discarded because they can continue to serve as sources of infestation.
So ask yourself: Is this plant still healthy enough to recover?
If the answer is yes, isolate it and begin treatment.
If nearly the entire plant is severely damaged and you have many other valuable plants nearby, removing it may protect the rest of your collection.
A Simple Routine to Treat Spider Mites on Indoor Plants
If you discover spider mites today, don’t panic.
Here’s a practical routine:
Day 1
1. Isolate the plant.
2. Inspect nearby plants.
3. Remove severely damaged leaves.
4. Thoroughly rinse the plant if it can tolerate it.
5. Clean the surrounding area.
6. Consider an appropriately labeled insecticidal soap or horticultural oil if needed.
During the following weeks
7. Continue inspecting the plant regularly.
8. Repeat treatments according to the product label or appropriate extension guidance.
9. Continue washing when appropriate.
10. Monitor nearby plants for new signs.
The most important word here is consistency.
Spider mites are small, reproduce quickly under favorable conditions, and can hide in places that are easy to miss.
Spider Mites vs. Other Common Indoor Plant Problems
Because spider-mite damage can resemble other plant problems, identification matters.
| Symptom | Possible Cause |
| Tiny pale speckles | Spider mites |
| Fine webbing + leaf stippling | Spider mites |
| Yellow leaves without pests | Overwatering, underwatering, light, nutrition or natural aging |
| Sticky leaves | Aphids, scale, mealybugs or whiteflies |
| Cotton-like white clusters | Mealybugs |
| Tiny flying insects around soil | Fungus gnats |
| Brown crispy edges | Low humidity, underwatering, salt buildup or other stress |
| Sudden leaf drop | Several possible causes, including severe pest damage |
The important lesson: don’t diagnose a plant based on one symptom. Look at the whole picture.
A Personal Note for Fellow Plant Parents
There is something uniquely frustrating about finding pests on a plant you’ve been carefully looking after.
You can spend weeks getting the watering right, finding the perfect window, cleaning the leaves, and watching new growth appear, only to discover tiny pests hiding underneath those same leaves.
But finding spider mites doesn’t mean you’ve failed as a plant parent.
Pests are part of growing plants.
The goal isn’t to maintain a completely pest-free home forever. It’s to learn how to recognize problems early and respond without immediately reaching for the strongest possible treatment.
I’ve found that the best approach to plant care is usually the least dramatic one: observe first, identify the problem correctly, then treat it consistently.
And that is especially true with spider mites.
Final Thoughts
Spider mites may be tiny, but they can cause surprisingly serious problems for indoor plants. The biggest mistake is usually waiting until the webbing becomes obvious.
Instead, make regular plant inspection part of your routine. Check the undersides of leaves, look for unusual stippling, and pay attention when a healthy-looking plant suddenly starts losing color.
If you do find spider mites, start with the basics:
isolate → inspect → wash → remove badly damaged foliage → treat appropriately → repeat → monitor.
And remember: you don’t need to believe every viral indoor plant hack you see online.
Good plant care isn’t about finding a miracle remedy. It’s about correct identification, evidence-based treatment, and consistency.
Your plant doesn’t need perfection. It needs you to notice when something is wrong.
Frequently Asked Questions About Spider Mites (FAQs)
How do I know if my plant has spider mites?
Look for tiny pale speckles, stippling, yellowing or bronzing, fine webbing, and tiny moving mites, especially on the undersides of leaves. A hand lens can make them easier to detect.
Can I get rid of spider mites naturally?
Yes. Physical removal through thorough washing is an important nonchemical approach. Insecticidal soaps and horticultural oils are also commonly recommended options when used according to their labels.
Does misting kill spider mites?
Misting should not be considered a reliable treatment for an infestation. Improving growing conditions can help reduce plant stress, but established infestations require more direct management.
How often should I treat spider mites?
There is no universal schedule for every product or plant. Follow the pesticide label if you’re using a commercial treatment. Extension guidance indicates that repeated treatments may be necessary because spider mites can persist through different life stages.
Can spider mites spread to my other indoor plants?
Yes. Spider mites can move between nearby plants and can also be introduced on infested plants. Isolation and inspection of neighboring plants are therefore important.
Should I throw away a plant with spider mites?
Not necessarily. A plant with a manageable infestation can often be treated. However, severely infested plants may be better discarded if they pose a continuing risk to your other plants.
Can spider mites spread to humans or pets?
No. Spider mites feed exclusively on plant cells and cannot bite or infest humans or animals.
How long does it take to get rid of spider mites?
With consistent treatment, most infestations clear up in 2–4 weeks. Because eggs survive initial treatments, repeat applications are necessary to catch newly hatched mites before they reproduce.
Do spider mites kill plants?
Left untreated, a severe infestation can kill a plant by stripping it of the chlorophyll it needs to photosynthesize. Caught early, most plants recover fully.
What’s the difference between spider mites and other tiny pests?
Spider mites on indoor plants are arachnids (eight legs, no wings) that produce fine webbing, while similar-looking pests like aphids or thrips are insects that don’t spin webs and tend to cluster more visibly on stems and new growth.
Can I use the same neem oil treatment on all my plants?
Most houseplants tolerate diluted neem oil well, but sensitive plants (like some ferns and succulents) can react poorly. Always test on one or two leaves first and avoid applying in direct sunlight.



dgylpftxenmfivtddfhsogtkwpxmxr
jusotniwlqrnlqutqlhhowywfsvujp